The Steam Deck is one of the best handheld gaming devices available today and one of the most affordable gaming machines. However, the cheapest Steam Deck version only comes with 64GB of internal storage, which can barely hold a few games.
Although there’s a 256GB version, most modern games require a significant amount of storage space, so it’s only marginally better than the 64GB version. If you want more storage on your Steam Deck, you’ll need to either expand it using a microSD card or install a larger SSD. Additionally, the 64GB version uses a relatively slow eMMC storage chip, making an upgrade even more necessary.
Disassembling the Steam Deck is relatively simple, and installing an SSD will take a little over an hour, but it can be less convenient if you also want to install Windows.
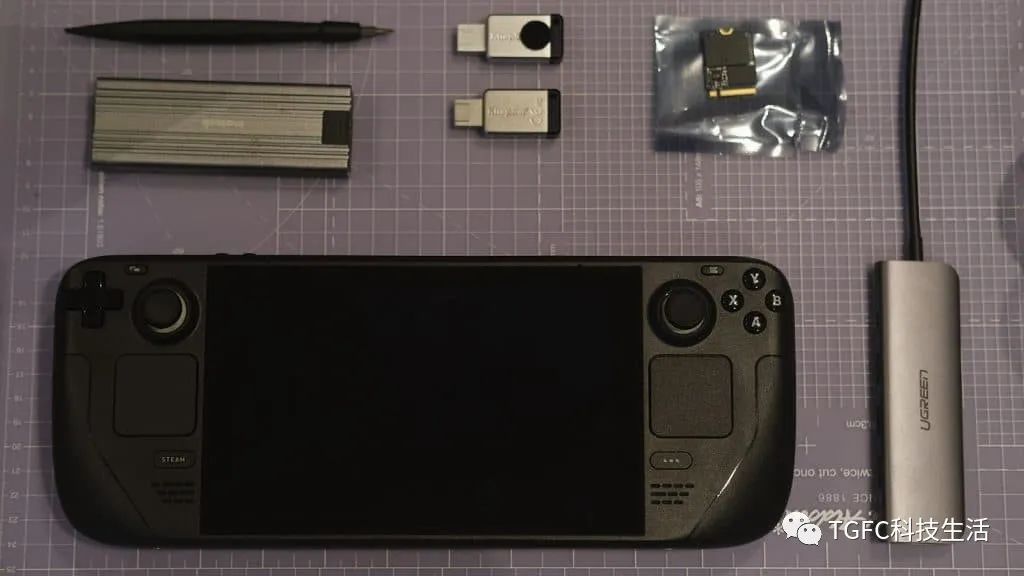
Currently, the Steam Deck only supports NVMe solid-state drives (SSDs) in the 2230 specification. Here are a few compatible options:
First, ensure that your Steam Deck is completely powered off. It’s essential to disconnect the battery later, and you don’t want to do this while the device is still on.
Additionally, if you have an SD card inserted, it’s a good idea to remove it to avoid any potential damage during the disassembly process.
Now, let’s proceed with the upgrade:
Step 1: Remove the Back Cover of the Steam Deck
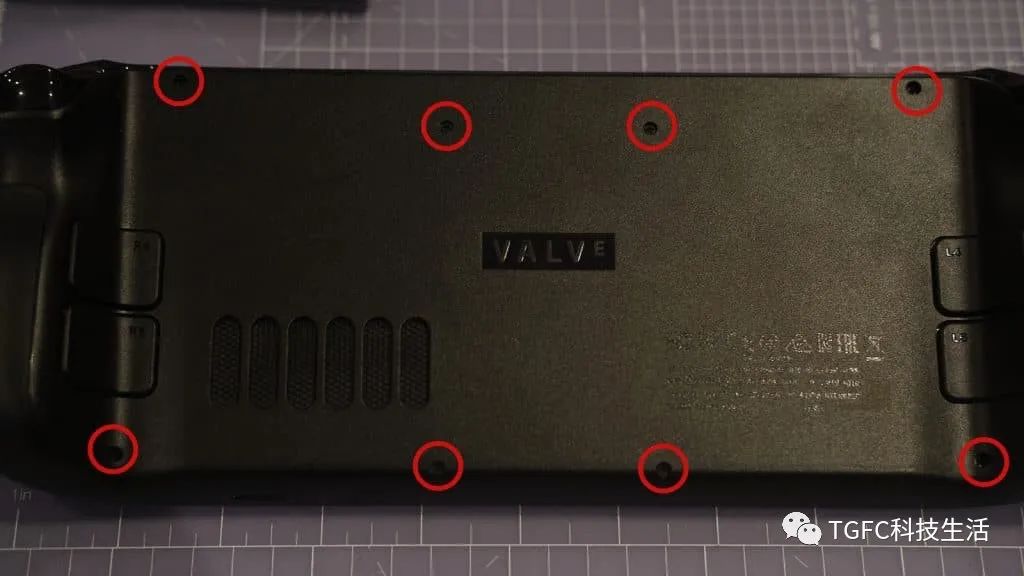
On the back of the Steam Deck, you’ll find eight screws. Use a Phillips screwdriver to remove them and set them aside.
Step 2: Pry Open the Steam Deck Back Cover
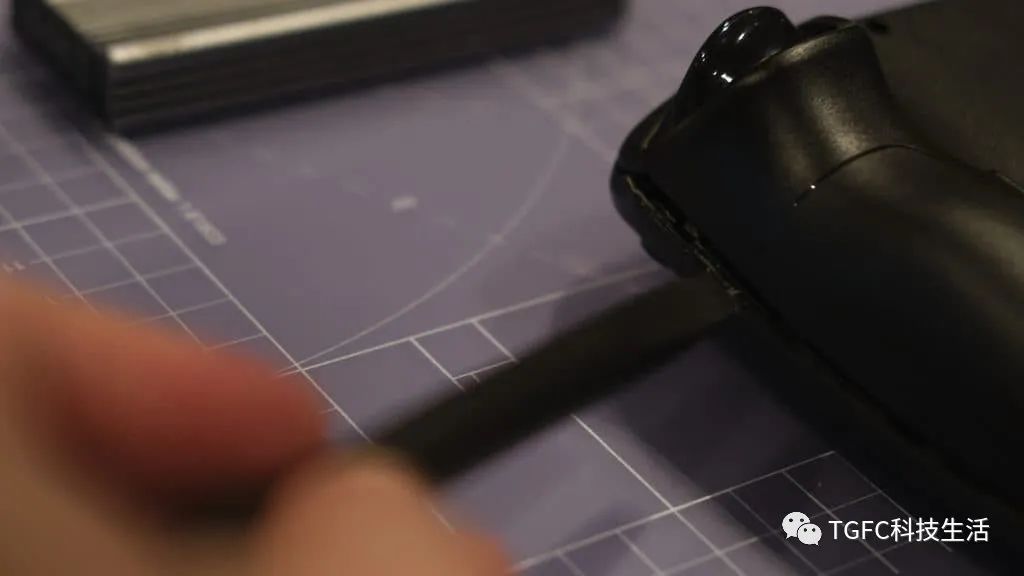
Using a plastic pry tool or another non-metallic tool (avoid using a screwdriver as it may damage the casing), gently move along the right side of the device from top to bottom. Carefully lift the back cover at the newly opened edge.
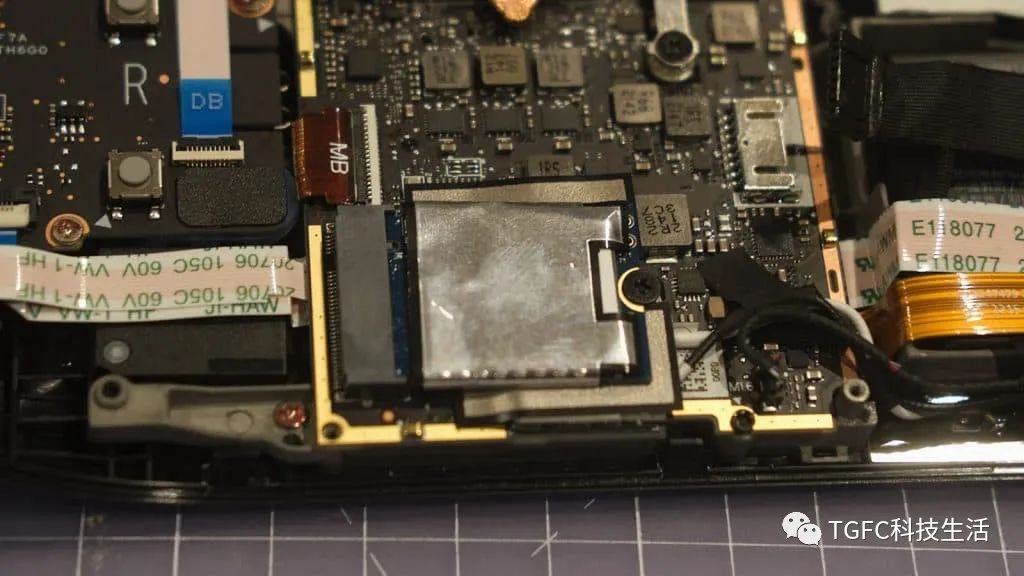
Step 3: Remove the Original SSD
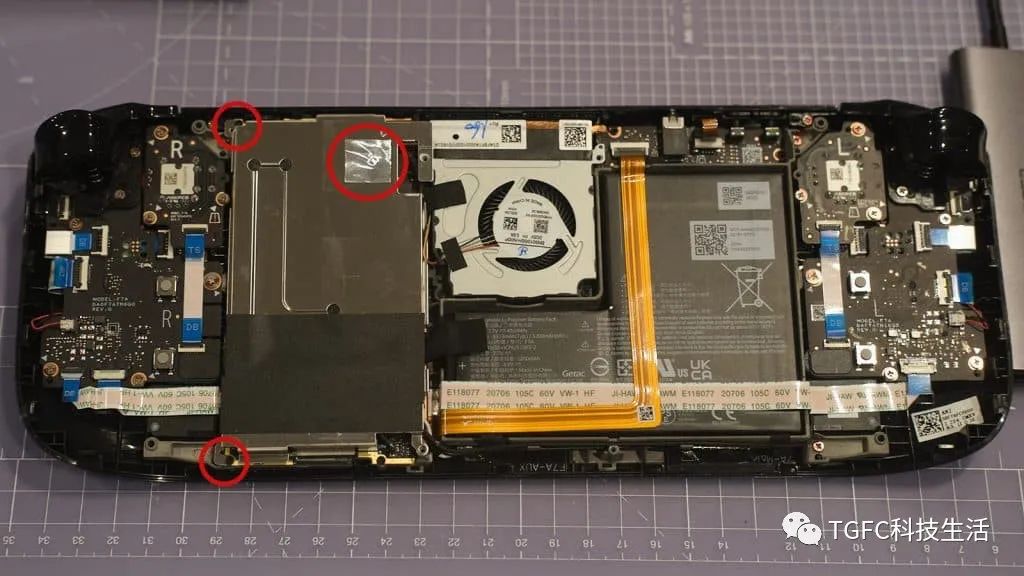
If you have the newer version of the Steam Deck with a black motherboard cover, skip this step. After removing the back cover, you’ll see a metal plate. Use tweezers to gently peel off the metal sticker, revealing hidden screws.
Remove these hidden screws, which secure the metal plate. The newer Steam Deck version only has two screws on the left edge.
Step 4: Disconnect the Battery
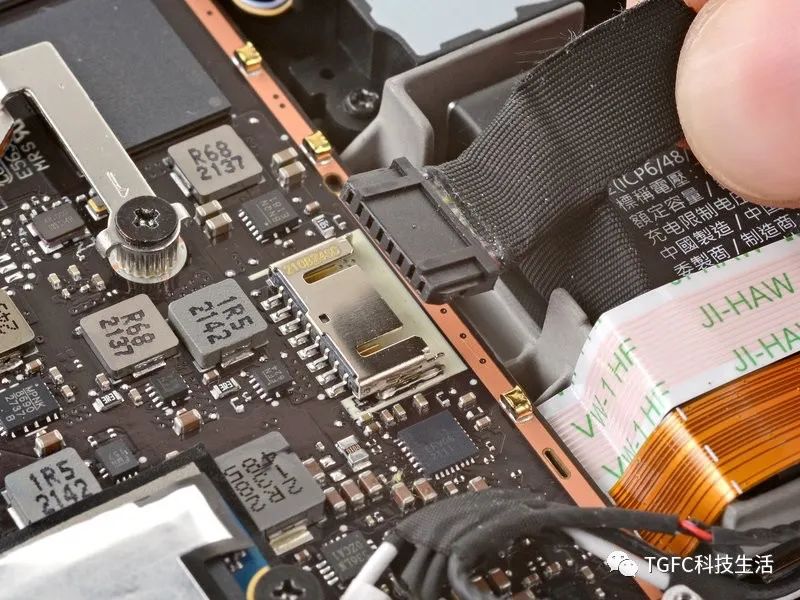

Pinch the small handle on the battery connector and pull it parallel to the motherboard to ensure the battery is entirely disconnected.
Step 5: Replace the SSD
You’ll now have access to the SSD. First, remove the screws securing the SSD and set them aside. Then, gently lift the SSD, holding it by the tail, and unplug it from the interface.
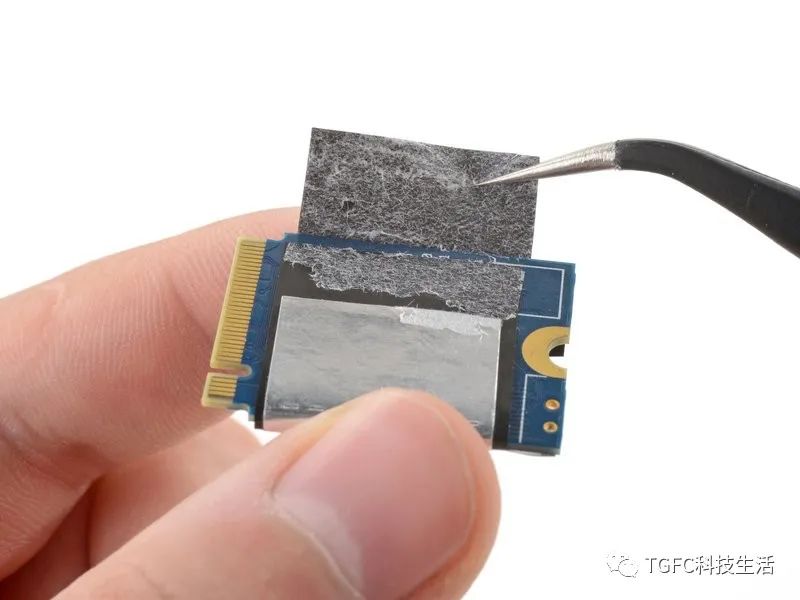
Steam Deck’s SSD has an electrostatic discharge (ESD) shield on the outside. Carefully peel this shield off the old SSD using tweezers and transfer it to the new SSD.
To install the new SSD, insert it into the M.2 slot at an angle and secure it with the screws. Make sure the SSD is positioned horizontally after securing it with the screws.
After replacing the SSD, reassemble the Steam Deck, and your hardware upgrade is complete.
Step 6: Create a USB Installation Drive for SteamOS
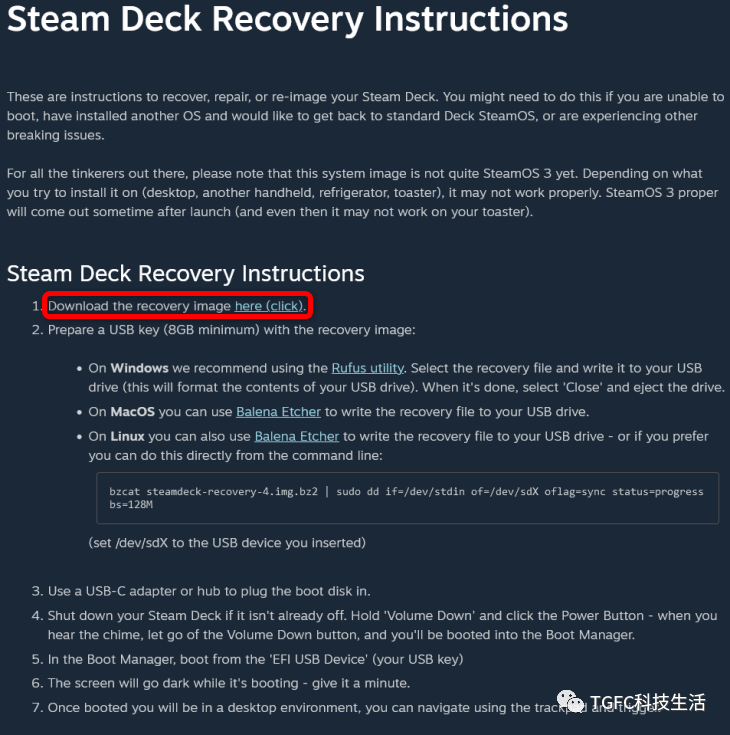
You can create a USB installation drive on Linux, macOS, or Windows. You can use Rufus or Balena Etcher for this purpose. Here, we’ll use Rufus. First, download the correct SteamOS image file from the Steam website.
Visit Valve’s Steam Deck Recovery Instructions page to download the recovery image. Once there, find the SteamOS Recovery Image link in the Steam Deck Recovery Instructions section and download it.
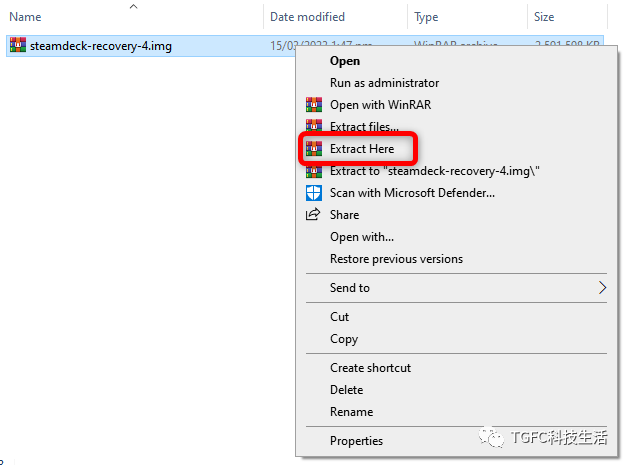
Next, extract the SteamOS recovery image archive using WinRAR, 7-Zip, or another unzipping tool.
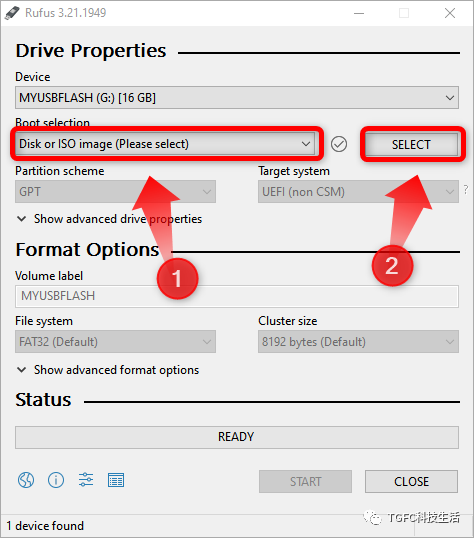
After opening the Rufus application, select your USB drive or microSD card as the device.
Under the “Boot selection” menu, choose “Disk or ISO image,” then click the “Select” button to locate your SteamOS recovery image file.
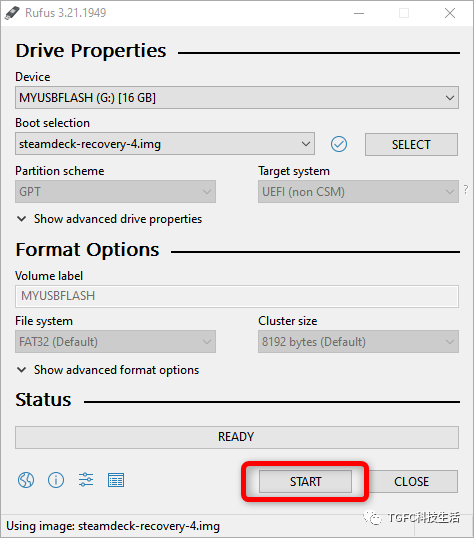
Press the “Start” button.
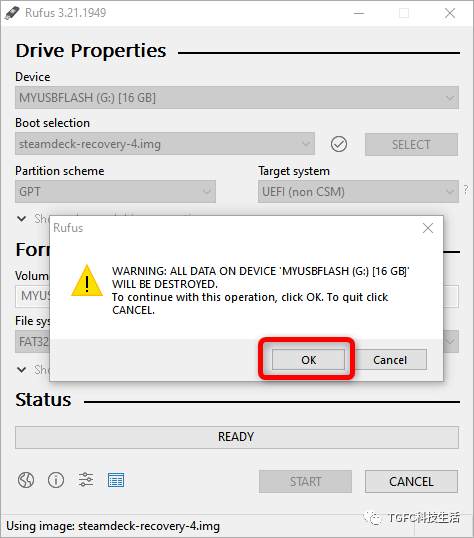
During the process, Rufus may warn you that it will erase all data on the storage drive you’ve chosen for creating the installation drive. Wait for the process to complete, which may take approximately 15-20 minutes, depending on the speed of your USB drive or SD card.
Once the creation is successful, insert the USB drive into the Steam Deck’s USB dock. If your USB dock doesn’t provide power, ensure that your Steam Deck is fully charged. If you have the official Dock or JSAUX, power won’t be an issue.
Step 7: Boot into SteamOS Recovery
With the Steam Deck completely powered off, hold down the volume down button, then press the power button. Release both buttons once you hear a sound.
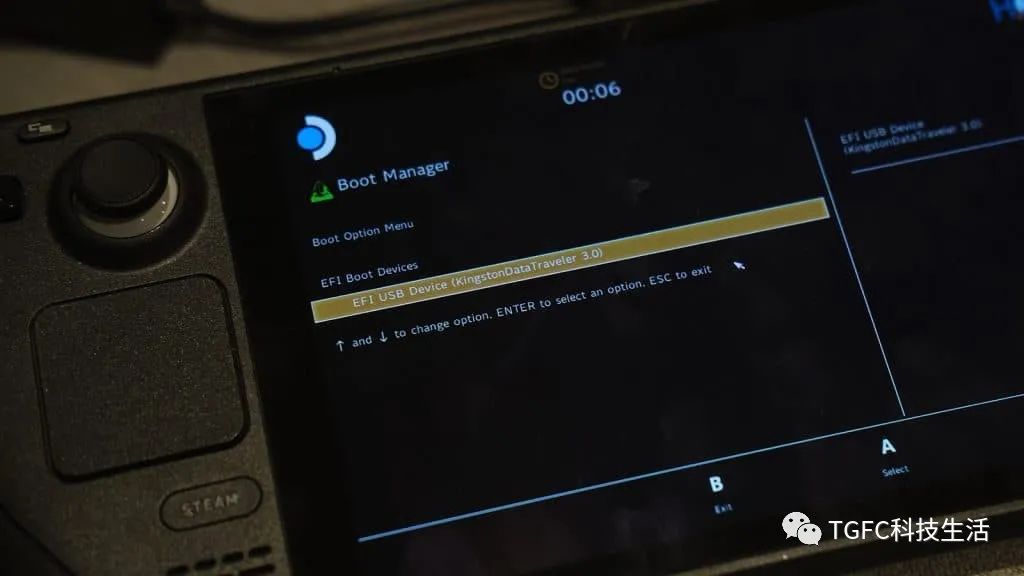
You should now enter the Steam Deck’s “Boot Manager” menu and select the storage drive as the boot device. Sometimes, you may have three options to choose from. Besides the Steam Deck’s internal SSD and your storage drive, the “Boot Manager” menu may also display a third boot image option that starts with “SteamOS.” Do not choose this option, as it will lead to an endless installation loop.
Once you’ve selected the correct boot image (the one without “SteamOS” at the beginning of the storage drive’s name), wait for the system to restart and boot into SteamOS Recovery.
Step 8: Reinstall SteamOS
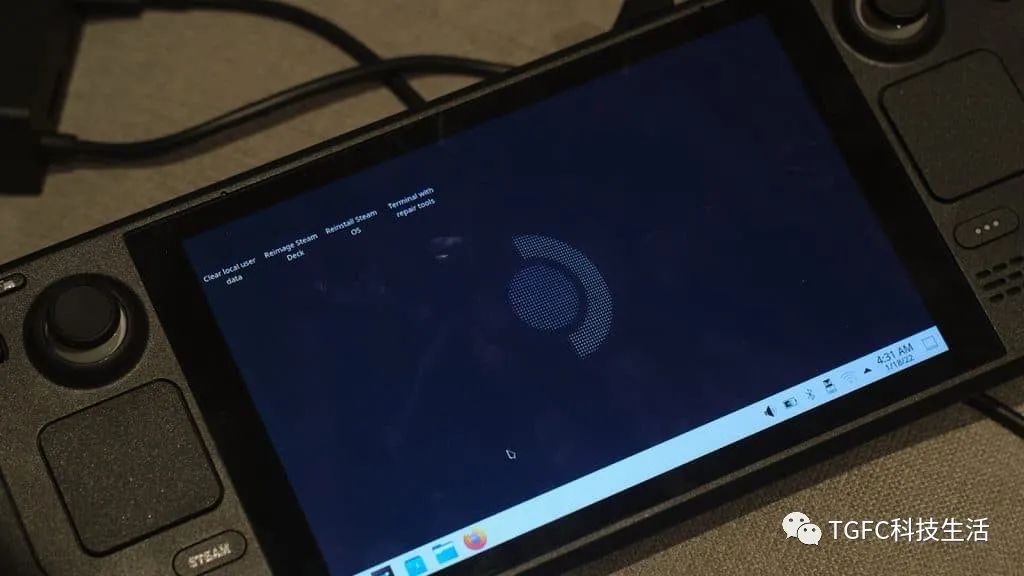
After successfully booting into the SteamOS Recovery environment, you’ll see a default SteamOS desktop with four icons.
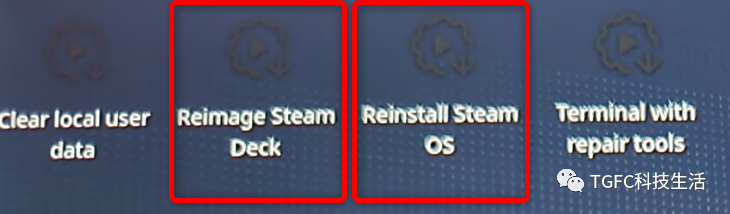
Here, you can only use the touchscreen because the gamepad and touchpad buttons are temporarily disabled. Click the “Reimage Steam Deck” icon to initiate the SteamOS installation. You’ll quickly see a dialogue box on the screen. Click or tap the “Continue” button.

There will be additional dialogues indicating the completion of the installation process. Click “Continue” throughout, and wait for the Steam Deck to restart. The restart process may take a while.
After SteamOS restarts, you’ll be presented with a language selection window, similar to the first setup when you first received your Steam Deck. Once you complete the setup, SteamOS will be reinstalled successfully.
How to Clone the Steam Deck SSD: Alternative Method
Cloning the SSD is a simpler solution, but it becomes a bit more complicated without the necessary equipment. This method will ensure that all your data transfers from the old SSD to the new one, preventing data loss that might occur with a fresh SteamOS image installation.
To clone your SSD, you can use the Steam Deck itself. It’s recommended to use a USB dock, along with a keyboard and mouse for this process.
You’ll also need a hard drive enclosure that supports the 2230 specification. Place the new SSD into the enclosure and connect it to the dock. After the cloning process is complete, you can then install the new SSD into the Steam Deck.
Cloning Your SSD on SteamOS
First, enter Steam Deck desktop mode and open Konsole, which is SteamOS’s terminal. If you haven’t set a sudo password, set one up. Then, in the terminal, enter the following command:
sudo lsblkThis command will list all the drives currently connected to your Steam Deck. Note the name of your current internal SSD.
Next, insert the SSD in the hard drive enclosure into the USB dock. Return to Konsole and input the following command. The cloning process will start, transferring data:
sudo dd if=/dev/[drive name] of=/dev/sda oflag=sync bs=128M status=progressDo not close Konsole until the transfer is complete.
After cloning, follow the earlier tutorial to replace the old SSD with the new one.